Dad’s Fish Stew

On New Year’s Eve, my husband Dave made his version of his Dad’s fish stew. This recipe has a story behind it that I’ll share with you. It always makes me laugh and I miss Dad when I tell it.

LomitaFish

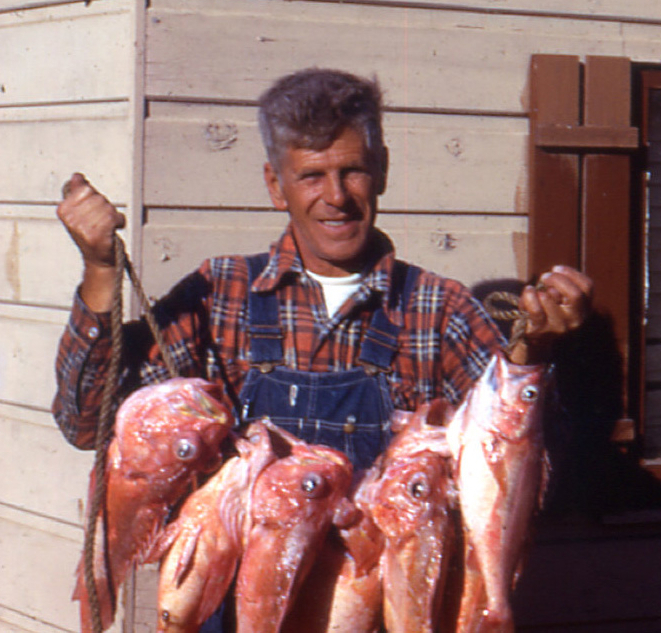
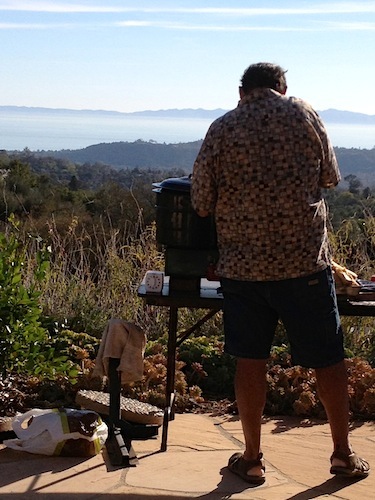
Bob Oster, deep sea fisherman

It was Christmas Eve, about 7 pm. The kids were hungry and ready to celebrate. Grandpa Bob was making fish stew using freshly caught fish he’d unloaded earlier in the day from Styrofoam ice chests (it was a 2-hour drive from Mom and Dad’s home in Los Angeles).

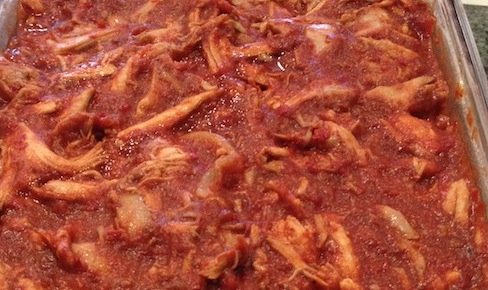
Dad was eager to share his recipe with us. He carefully filleted the fish and used the fish frames to make a broth base for his piquant tomato stew, which featured lots of garlic, whole peppercorns, mushrooms, and large pieces of flavorful fish. He showed me the sealed box of a special imported pasta he’d gotten at an Italian market in San Pedro — the absolute perfect pasta for his stew, he said. The fragrance of the stew was making us all hungry and I was glad when I saw water boiling for the final step: cooking the pasta.

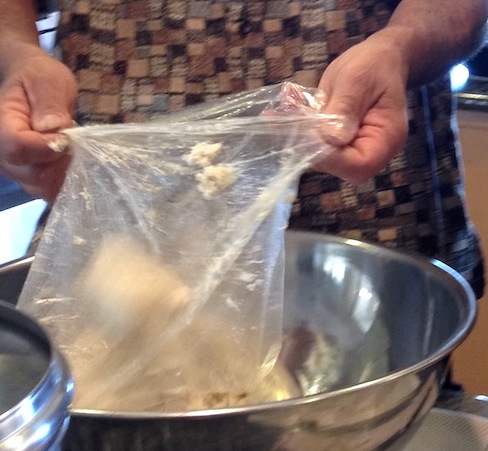
I left the kitchen to do the last minute gift wrapping. An urgent call from Dad brought me back into the kitchen. When I arrived, Dave and his dad were staring into the pot of simmering pasta. They pointed to the small black dots rising to the surface. A stir with a long spoon released more dots… weevils.

Dad was quickly skimming them into a bowl; it was too late to go buy more pasta. Working together, we continued to clear the surface as the pasta simmered. Then we rinsed the cooked pasta carefully, hoping to wash any remaining weevils down the drain. I put the salad onto the dining room table and reassured the rest of our hungry family that the long-anticipated main course would be out soon.

As Dave pulled the garlic bread from the oven, Dad motioned us over to the serving dish he’d filled with steaming pasta. No weevils remained. He put his finger to his lips and with a twinkle in his eye, he ladled his spicy stew onto the pasta, then he picked up our large wooden pepper mill and began twisting black dots of pepper onto the surface… just in case.

FishStew

We said nothing as he brought his fish stew to the table and we all sat down to eat. Everyone agreed that Dad’s stew was the best Christmas Eve dinner we’d ever had and was destined to become a family tradition. It was several years before we shared this story with the rest of the family. But Dad’s stew has remained a holiday tradition… without the weevils.

Dave’s Fish Stew Recipe

Dave’s recipe is quicker than Dad’s but tastes equally delicious on a chilly winter evening.

At the fish market, Dave asks for:

  • 1 large fish collar (aka the ringbone, or ask for fish frames)
  • 1 to 1-1/4 pounds of white seabass (other fish will work as well), cut into 5 serving-sized pieces.

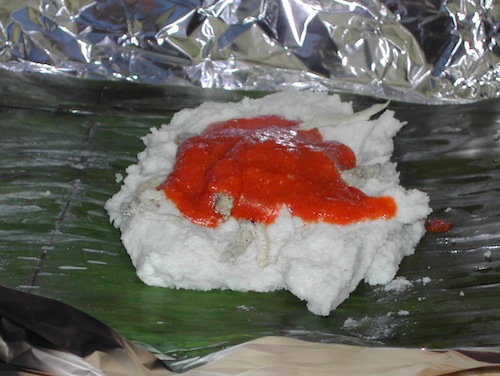
Here’s what fish collars look like:

FishCollars

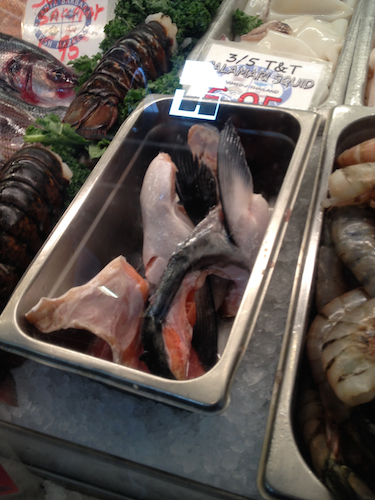
Dad included the heads and head fins, but he scaled, skinned, and filleted the fish himself and didn’t believe in throwing ANYTHING away.

CollarBroth

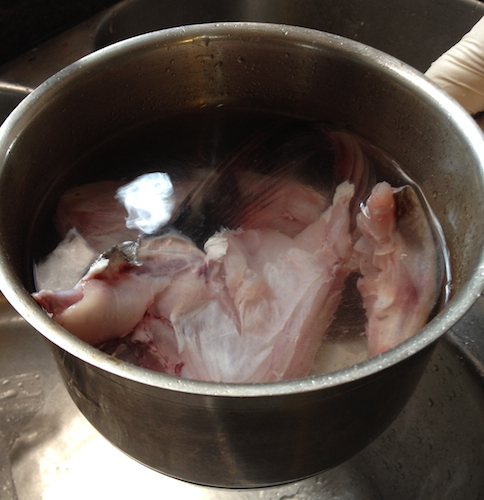
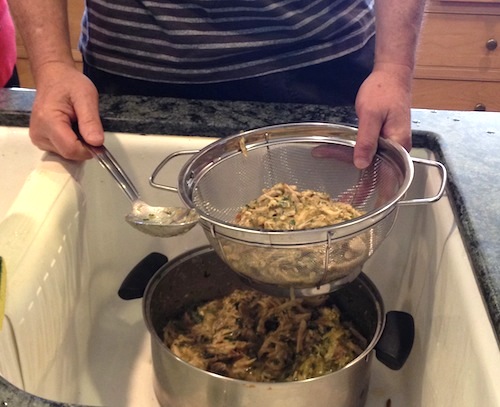
To start the broth, Dave breaks up the fish collar and adds:

  • Water to cover
  • 1/2 teaspoon salt

He simmers that for about 1 hour. Then he removes the collar bones and saves any meat that was on the bones to add to his stew later.

Meanwhile in a large frying pan he sautés in olive oil:

  • 3 or 4 cloves of garlic, chopped
  • 1 large shallot, chopped

and adds them to the broth. In that same frying pan he  reduces :

  • 1/2 cup white wine (reduced to 2 tablespoons)

Then he adds:

  • 2-1/2 cans (15 oz. each) of organic chopped tomatoes (include the liquid)
  • 1 cup water
  • 1 teaspoon whole peppercorns
  • 1/2 pound fresh mushrooms, sliced

StewSauce

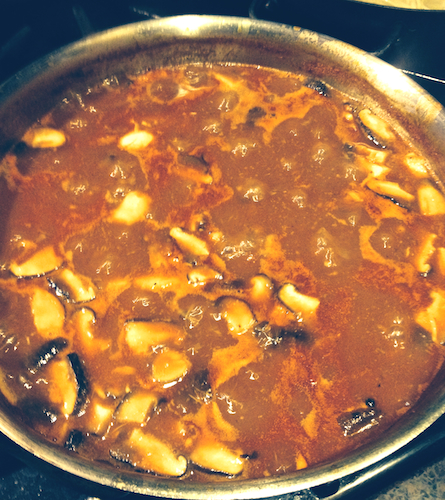
He adds the simmered fish broth when it is ready and  simmers this for about an hour.

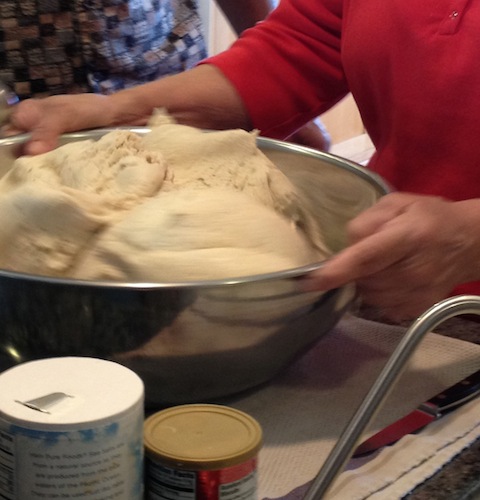
He brings a pot of salted water to boil and cooks until it’s al dente:

  • 1/2 pound linguini (or any other weevil-free pasta)

When the pasta is almost done, he adds the fish fillet pieces to his stew to simmer for 3 to 5 minutes (until opaque). He then adds the reserved collar meat and seasons the stew with salt and pepper to taste.

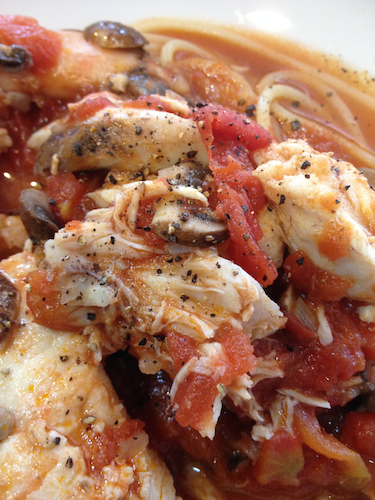
To serve, he puts a serving of pasta in each bowl, followed by a fish fillet and the stew sauce.

He garnishes each serving with:

  • Black pepper, freshly grated — it’s traditional
  • Grated Parmesan or Pecorino cheese to taste

New Year’s Tamales

I think I am a tamale hoarder. Back when we were first married our neighbors would bring us tamales on Christmas Eve. I’d store them at the very back of the holiday food filled refrigerator hoping no one would notice them so we could eat them later, a little at a time, enjoying every bite.

So when our friends Milt and Letty invited us to join them in making tamales for New Year’s Eve, I said yes immediately even though I already have a freezer full of Guatemalan tamales. I felt like I’d hit the tamale jackpot!

When we arrived in the morning on Dec. 30, Letty had  the fillings ready to go—made using her homegrown chilies and tomatillos.

RedChix2

Red Chili Chicken Filling

A family of childhood friends with many years of tamale making experience would guide us along the path to perfect tamales. Sandy and Nancy, the tamale matriarchs, were on their way from Thousand Oaks.

Their brother Fred and his wife Vickie had helped set up a table outside for our assembly and two steam pots on a propane camping stove. Milt and Letty’s daughter Iris was there to help and Fred’s niece Ceci was expected to arrive a little later to help us spread the masa onto corn husks, fill them and fold them into tamales.

Letty took a look at the green chili chicken filling and decided we should drain off some of the excess moisture (which we heated later and served as a  sauce).

GreenChix

Green Chili Chicken Filling

We had 20 pounds of freshly prepared masa from La Tolteca Tortilla Factory, which Fred began to put into a mixing bowl in anticipation of his sisters’ arrival.

MasaTolteca2

Sandy, Fred’s older sister showed up just at the right time to direct the mixing in of additional salt, baking powder, and schmaltzy chicken broth.

MasaEval

Noting the cottage cheesy texture of the masa, she said we needed to make it smoother, lighter, and creamier before we spread it onto the corn husks.

CottageChMasa

Fred did the mixing.

MixMasa

The final consistency looked like loose hummus.

HummusMasa

Fred manned the steamers once we got the first batch ready to cook. The tamales took about an hour to cook.

Keeping the types separate and labeled correctly takes a some attention and good organizational skills. Knowing when they were done required passing around sample tamales to taste. Fluffy masa, lots of filling and an olive in each one. Perfect!

Steamers2

My apologies to my East Coast cousins and European friends. Yes this is December.  Yes that is the ocean and the Channel Islands in the distance.  Yes Fred is wearing shorts and sandals. Yes the tamales are delicious!

Cornhusktamales

Happy New Year!

Holiday Tamales

Shh! Don’t tell anyone but I have a freezer full of tamales. Our friends Mary and Alex and their son Sandro (and his sons) came over before Christmas to make Guatemalan tamales with us.

This is not the first time we’ve made Christmas tamales together. Here’s a 2001 photo of Alex and I  mixing tamale masa under the supervision of Alex’s mom.

Masa2001

In Guatemala tamales are wrapped in banana leaves, which are steamed before use.  That year Alex’s mom prepared our leaves.

AlexsMom2001

This year it was my husband Dave, Alex, and Sandro who pre-cut the leaves before steaming.

Banana Leaf2013

We steamed them in a really large steamer so we could do them all at once.

While they steamed, Sandro mixed the masa.

SandroMix

Alex’s mom is no longer here to guide us so Alex checked her hand-written recipe  as they worked on getting the consistency of masa right. This is the trickiest part.

Meanwhile Mary and I shredded the pork and chicken we’d simmered and cooled.

ShredChix

Then Alex started working on the sauce, using a variety of chilis he’d gotten at the Vallarta Market in Oxnard.

Chilis

He pan fried the chilis along with sesame seeds, pepitas, and spices to bring out their aroma and flavors.

Spices

Then he spun them up in the blender with tomatoes and bell peppers. He fried the mixture in lard and simmered on the stove top until it was thick, fragrant, and delicious.

SauceSimmer

We formed an assembly line to fill, wrap, and tie our tamales the way Alex’s mom had shown us:

FillingFolding

When we finished wrapping and tying, we put them into the steamer for 3 hours while we visited and snacked on  tortillas filled with black beans and queso fresco.

At 7 pm friends started arriving for my son Shaun’s birthday celebration. Our kitchen quickly became packed with people  so I don’t have photos of the finished tamales. But I do have a photo of the ones we made in 2001 for reference.

TamalestoEat

As you can see these are meal-sized tamales with a moist masa and a hearty meat filling. When I asked Mary about putting vegetables in the tamales she told me, “Real tamales are made with MEAT and LARD!” Hey, I can’t argue with that and I really don’t want to.

Wisconsin Farm Girl: Pecan Cheese Ball

Cheeseball

Just in time for the holidays Loretta showed me how she makes her pecan cheese ball. She uses walnuts instead of pecans, she explains,  because they are cheaper and were more abundant when she moved from Wisconsin to California.

Loretta’s recipe uses Old English Cheese Spread, a processed cheese that comes in the kind of jar that my mom saved and used for kid-sized servings of orange juice at breakfast.

The beauty of this recipe is that it is simple and can be adapted to your own taste. Basically you use softened cream cheese and either cheese spread or grated cheese. Loretta’s recipe uses onion and garlic powder for seasoning. Mix together, wrap in foil and chill while you chop the nuts of your choice.

NutGrind

Then mold the mixture into a ball and roll in the nuts. Clean the foil and put it back around the ball and store in the refrigerator. Serve with crackers.

When asked to contribute a lower calorie recipe using Garlic Gold® Nuggets (a toasted organic garlic condiment) to be posted as one of their holiday recipes, I immediately thought of ways to adapt Loretta’s simple recipe.  You can see the result in my opening photo. Very popular at our house this season.

Garlic Gold® Pecan Ball Recipe

4 oz. low fat cream cheese
4 oz. reduced calorie cheese, grated
1 Tbs. Garlic Gold® Nuggets (plain, salted, or seasoned)
Chopped pecans

Put cream cheese and grated cheese into a food processor with Garlic Gold® Nuggets. Process to mix. Then chill mixture for 1 hour. Roll into one large ball or several smaller balls. Roll balls in chopped pecans.

Variations:

  • Add chopped sundried tomatoes to cheese mixture
  • Mix fresh herbs, chili, or grated lemon rind into cheese mixture.
  • Form into log or disk rather than ball.
  • Drain carton of non-fat yogurt through coffee filter in refrigerator until it becomes as thick as cream cheese and use in place of cream cheese.

Shaun’s Ginger Roll Cake

Yesterday was my son Shaun’s birthday. For the past few years he has asked me to bake ginger rolls instead of a birthday cake. This is a two-day process that involves making the light buttery brioche dough I learned in Paris, then giving the dough a cool rise overnight in the refrigerator.

I also chop a huge amount of fresh ginger to simmer and then I turn that into a filling of candied ginger and syrup.

The next day I roll the dough into long snakes filled with the candied ginger, tie them into knots, and drop each one into a muffin cup partially filled with ginger syrup.

When that rises to a marshmallowy lightness, I spoon on more syrup and bake. When the baked rolls come out of the oven, I brush on more syrup.

Yeah. It’s easy to see why Shaun hides all 6 pans of these at the back of the freezer and only shares them with Saraphina (who also chooses them over cake on her birthday).

But yesterday on the way home from school, Saraphina had an idea. “We could stack the rolls and make them into a cake,” she said. Brilliant idea. I knew exactly how to do it because when we had our bakery I made cinnamon roll monkey bread.

So we stacked them in a bundt pan with additional syrup between the layers.

Here is the result.

Saraphina did the decorating. Then we had a surprise for her—a new litter of Starlight Mice on one of the pans! These are ginger mice, a breed we haven’t seen before.

They crowded onto the plate for the candle lighting and joined in the celebration. No doubt there will be more soon. That’s just the way it is with these little guys.

Wisconsin Farm Girl: Loretta’s Turtles

You know that caramel that sticks to the inside of the sauce pan when you pour the buttery rich fragrant molten caramel onto a sheet pan to cool? Well don’t think you’re going to eat it over the sink. My friend Loretta grew up during the Depression when nothing that could possibly be used went to waste. I grew up in a family where it was the job of the grandchildren to clean the candy pan.

Loretta says her mom called her flexible Rubbermaid spatula a “child cheater.” That’s because the spatula cheated the kids of all that gooey goodness left in the pan.

“Go get that child cheater over there,” Loretta instructed me. We used it to scrape every last bit of caramel from the pan onto a plate to cool. As we cut our cooled caramels into perfect rectangles, we added the trimmings to that plate too. “That’s for the turtles,” she told me.

After our caramels were cooled and wrapped, we arranged pecans on a pan in clusters of three—to form the base of our turtles.

Taking a glob of soft caramel, Loretta showed me how to mold it into a ball and press it onto the center of the three pecans.

When I made them at home I used caramel that was still hot and pourable (see below).

However, I like Loretta’s method better because you can make the caramel stay where you want it. Mine flowed down the sides of the pecans.

The final step was to heat some chopped chocolate. We melted a semisweet chocolate bar with a milk chocolate bar (to please everyone).

Using the microwave speeds up the melting process. We started off at 30 seconds and stirred between intervals. The residual heat continues to melt the chocolate while you stir. If you plan ahead, you can set a container of chocolate in the sunlight to melt (indoors if it’s cold outside).

Loretta recommends stirring in a small amount of shortening to give the chocolate more shine. We used 1 tsp shortening to 1 cup of melted chocolate.

Chill your turtles briefly in the refrigerator then tap the pan on the counter to get them to release cleanly from the pan.

Voila! Time to test the results. It’s best not to let anyone else know you are making turtles and raise their hopes that there might be any left for them after the tasting.

Christmas Cookies!

For the past 19 years my aunts, uncles, cousins and their families and friends have come to my house on the Saturday after Thanksgiving with bowls of homemade cookie dough to roll out or form into balls, or slice, or drop from a spoon, then bake and decorate.

We all have fond memories of grandma’s cookie jar so we often make our old favorites, like snickerdoodles, hermit cookies, and pfeffernusse. Our foremothers were excellent bakers and we were all good bowl cleaners. We also did our share of cookie decorating.

Alas, our foremothers and forefathers are gone now and we are the older family members carrying on our family traditions while our children’s children clean the bowls and learn to decorate cookies.

This year we had a new crop of 2- to 10-year-olds to decorate our sugar cookies.

Note the empty bottle of sprinkles at the upper middle (… one of many). As you can guess these were eaten with joy by those who decorated them. (Thanks for Nicolas Nocker for this photo.)

Here’s a close up of one of my favorite masterworks of cookie art.

And another.

Those who were three-years-old at our first Cookie Bake are now 22 and have become really sophisticated bakers. Lauren, for example, made salted caramel snickerdoodles this year. Grandma would have swooned over those cookies. They didn’t even make it to a cookie jar.

We try out new recipes, experiment, help each other with doughs that come out too stiff or too soft, and get caught up on events of the past year while we work together in the kitchen. What I really love hearing is that it’s the grandchildren who make sure that my cousins remember to come each year.

Wisconsin Farm Girl: Loretta’s Caramels

My friend Loretta is 85-1/2. She grew up on a dairy farm in Wisconsin during the Great Depression, one of 13 children.

We’ve been friends for about 38 years. Recently, I’ve been helping her organize her recipe file, gathering food stories to add to her recipe cards.

Yesterday we made caramels together from her mother’s recipe. She’d talked with her sister the night before and gotten some tips—like chill the caramels 5 minutes in the freezer before scoring. Loretta asked her sister, “How did Mother do it? She didn’t have a freezer!” Her sister pointed out that the porch was her mom’s freezer. She made caramels in the winter when there was snow outside. A few minutes in the snow firmed those caramels right up.

I brought my fancy new spatula/candy thermometer and the ingredients. Loretta measured and I stirred. When the mixture reached 250 degrees we poured our satiny caramel onto a buttered sheet pan and after a short time in the freezer we pressed  pecan halves into the cooling caramel.

The next trick was to cut between pecans… after waiting for the caramel to cool enough to cut it with a knife.

Being impatient to get to the eating part we started cutting too soon and had strings of hot caramel hanging from our knife, so I grabbed a pair of scissors, which cut cleanly between each pecan. Loretta wrapped while I cut.

Yeah, some of them didn’t make it to the waxed paper wrapping part. We also made turtles. I’ll save that for the next post.

In the meantime, here’s the caramel recipe:

Cold Weather Caramels
3/4 cup sweetened condensed milk
2 cups brown sugar
1 cup dark corn syrup (or you could try Golden Syrup)
1 cup butter
1/2 tsp. salt
1 tsp. vanilla
Pecans

1) Combine all but vanilla and pecans. Bring to a boil and cook, stirring, until the mixture reaches 240 degrees (soft ball).

2) Add vanilla and cook, stirring, until mixture reaches 250 degrees (firm or hard ball).

3) Pour into pan (about 1″ thickness) and put into freezer for 5 minutes.

4) Remove from freezer and press in a pecan half for each caramel. Mark squares with a knife and let cool completely. Then cut with a knife (or scissors) and wrap in waxed paper.

Torch Flambé

I test and edit the recipes for Edible Santa Barbara Magazine. This week I made some wonderful ginger creme brulées. I saved a few to take to movie night with our friends Anne and John. I figured we’d test the broiler method (instead of a torch) for caramelizing the sugar.

But when we arrived John said, “I have a torch!” He went outside to search and came back with hardware store style propane torch. We lit it and Dave began to heat the sugar on the top of one of the servings. Anne grabbed her camera to photograph the caramelizing process.

No, this is not our standard caramelizing process. Normally the flame comes from the torch tip. While Dave calmly blew out the flames, the rest of us looked on in horror. Anne just happened to snap her photo as the flame shot toward the ceiling, then she put down the camera in shock.

We decided maybe we should use the broiler method and John should retire this particular torch.

How I Spent My Day

The plan was to spend my day transcribing an interview for my next article in Edible SB, but then a younger friend called and asked me to teach her how to make a fondant-covered cake, like the ones she has seen on the Food Network.

So she came over and we baked up a couple of layers for a small cake. Saraphina arrived home from her first day of school in time to help us knead pink food coloring into the fondant.

Then they made invitations to a cake and tea party to celebrate Saraphina’s first day of school.

Saraphina chose orange for the frosting which Aliyah piped onto the cake (her first time piping frosting… obviously she’s a natural).

The pink pearls were pressed onto the cake by both girls. Then we made lime leaf sun tea with honey and a little sugar.
So there you have it. A pink princess cake and two happy girls.

I can transcribe tomorrow.

Cooking with family and friends